weaving etiketine sahip kayıtlar gösteriliyor. Tüm kayıtları göster

3 Eylül 2012 Pazartesi

Unbe-WEAVE-able

This hairstyle turned out really cute and I wish these pictures did it better justice but we were in a condo on vacation and these were the best shots we could get.  
Make sure you start with wet hair and create a high part going from one ear to the other so that you have a "headband" like section in the front.  Now you are going to create 8 small sections out of that front section you just created.  (4 on each side.)  Secure each of those 8 sections with a small elastic.  
Now you've got 8 little ponytails that you will pull out of the way and have your princess hold for a minute.  Divide the remaining hair in half by creating a part directly down the center of the head.  Pull each side into a low ponytail. 
 Now bring those 4 ponytails from the left side of the head and add them into the ponytail on the right side with a new elastic.  
You will now weave the 4 small ponytails from the right side through the left side ponytails using an alternating over and under method.  (I used a Topsy Tail to make it a bit easier.)  Once they have been weaved through you can secure them into the ponytail on the left side with a new elastic.
I've included this picture to show you what my weaving looked like in the back once I finished.  You can see that they are not crossing directly over that center part like they should so I just adjusted them with my fingers a bit until they all cross over that center part and then sprayed them with hairspray to make sure they stayed put. 
You can leave your two ponytails loose or finish them off however you like.  I've done a 5-Strand Braid out of each and you can find the instructional video for how to do that here.  

6 Temmuz 2012 Cuma

Friday's Film: Butterfly Weave

Here's a video showing you a new twist on one of our all time favorite hairstyles, The Butterfly Wings.  (You can find the original post for Butterfly Wings here.)
It's very simple and had people stopping us all day asking how it was done.
Here's a closer look at the style. 
We started with an off-centered part on the front because I like how that makes the hair look. 
Depending on how long your princess's hair is, you should be able to just let the ends of your woven strands hang down.  If they are a bit short, you can secure them with bobby pins.    
You can also curl the rest of the hair that is hanging down for a more elegant look. 

1 Haziran 2012 Cuma

Friday's Film: Basket Weaving

This was another hairstyle that we got SEVERAL requests for a video on.

 It's our Basket Weaving hairstyle from last week and it's very easy as you will see.
The original post for this style can be found here and it's got the written instructions plus some more pictures.

There are several ways you could end this hairstyle.  Here we have two piggies and in the video we have a 4-Strand Braid.  You can use whatever you like.

23 Mayıs 2012 Çarşamba

Basket Weaving

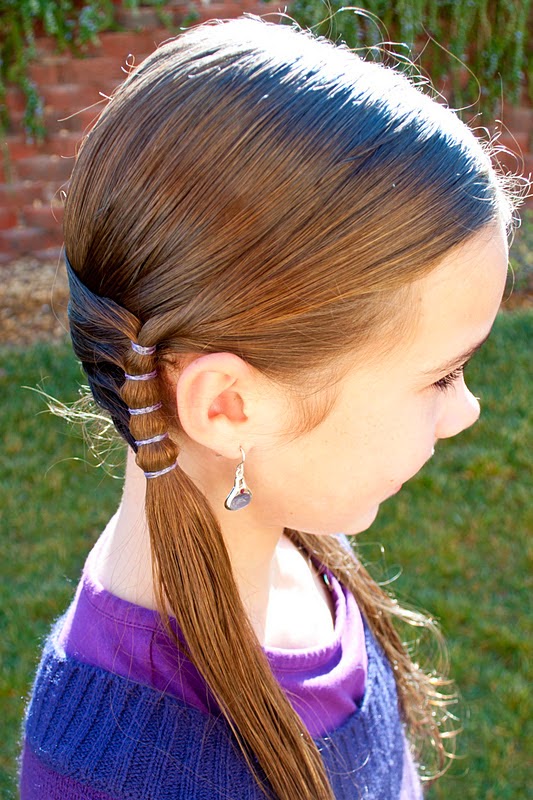
Here's a new one that we came up with today that is basically just a variation on our Swedish Piggies.  It looks difficult doesn't it!  That's the beauty of it, this is one of the most simple hairstyles to create!  We've called it "Basket Weaving" because that's exactly what it looks like but there is no weaving involved - thank goodness! 
You can start with wet hair or dry hair but I do find that the ends sty in place better with wet hair.  Make a small part coming off of your bang line that is about 2-3 inches long. 
It can be right in the center or off to ones side like we've done here.  I like how the bags look "swept" this way.  Now comb the remaining hair straight back. 
Gather a section on each side of your part going down to the ear and secure those sections into little piggies using elastics. 
You now have two new pieces of hair that you are going to work with.  Simply cross them over each other at the back of the head (over the rest of the hair) and tie a half knot.  (The first step when tying your shoelaces.) 
 Have your princess hold the left side while you gather a small section of hair on the right side just below that first elastic.  Secure the right side of your half knot in with that small section by using another elastic.  Do the same over on the left side.  You've now made the top of your "basket". 
You still have two pieces of hair to work with and you are going to cross those over each other to create a half knot once again and just repeat the steps as before.  Continue this process down the head until you have gathered all of the hair in from the sides of the head.  You may still have some hair hanging down and you can divide that in half and add it to each final piggie by securing them with elastics.  The style gives the really cool effect of being woven together when really it's just stacked.
  Told you it was simple!  

20 Şubat 2012 Pazartesi

Woven Puffy Braids

This is a beautiful hairstyle but you will need a good 20-30 minutes to complete this one.  (Just wanted to give you a heads up so you didn't get frustrated on one of those "crunch time" mornings.)  :)
Begin with wet hair and create a part directly down the center of the head so that you now have two equal sides.  Section out a small area on one of the sides (right up in front) and secure it with an elastic.  Create a parallel section on the opposite half of the head.  Now you've got two small piggies on top to work with. 
Separate each piggie into 3 equal sections and twist each section.  Your princess will be a huge help in holding the twist for this hairstyle until you need them.  Have her hold the six twists while you create another section on one half of the head, directly under that first section.  Pull the 3 twists from the opposite half of the head over to that new section and secure all of that hair together with an elastic. 
Now section out a parallel new section on the other half, just below the first section and take the 3 remaining twists that your princess is holding and weave them through the first 3 twists that are already coming across the head. 
Weave them in an over-under patter and alternate which way your pattern goes with the different twists. 
 Once they've all gone through you can secure them in with the hair from your brand new section.
  Now you've got two piggies once again.  Comb out any remaining twist from before.  Divide each ponytail into 3 equal sections and create twists out of each of those so that you once again have 6 twists to work with.  Repeat the steps from above to create another woven section.  Depending on how large you aer making the sections on the head, you could have 3-8 woven areas going along the back of the head.  We have 4 here. 
 Once all of the hair was gathered, we finished off our piggies with a couple of Hawser Braids. (Two Corkscrews twisted together.) 
We then went through and covered each of our elastics with tiny claw clips just to give it a fancier look but this is not necessary.  Add some hair bows and you're all finished!

27 Ocak 2012 Cuma

Friday's Film: 7-Strand Braids

You may have noticed a couple new things on our sidebar.  We now have links to our Facebook page and our Pinterest page.    Pinterest is particularly fun because it allows you to pin the hairstyles that you are interested in and then you have a quick reference when you're stumped on what to do in the mornings.  Hopefully these with both be helpful links for you!
The hairstyles for today are ones that we have done before but did not have videos for.  We got a request for a 7-Strand Braid from a follower in Brazil and I wasn't sure which particular one was being requested so we made a video for both.  Keep in mind that working with 7 strand is much more difficult because there are less spaces between the fingers to hold everything.  I say "difficult" but not "impossible".  Practice a bit and it will become easy for you.  These videos will hopefully help you and not confuse you more because it is a bit hard to get the perfect angle with my hands and the video camera.  :) 

This one is officially called the "7-Strand Braid" and the original post can be found here.
This braid is a bit easier if you can do it without a full ponytail.  The more hair, the harder it is to hold.  Maybe try it with a half-up style as well!
This shows the braid up close and you can see that it has more of a weave look to it.

This one is called "Lucky Number 7" and the original post can be found here.
You will want to secure all the strand together at the bottom with an elastic. 
Here's a close-up of the weave in the braid.


23 Ocak 2012 Pazartesi

Jacob's Ladder With Weave

This is a hairstyle that takes a bit more time so it's not a great one if you've only got minutes to spare.
  Begin with wet hair and separate a small area next to the left ear that you will set aside for later.  (This will be the hair that you weave with.)  Now create a horizontal part all the way around the back of the head from the left ear over to the right ear.  It can either be right in the back of the head or it can lay a bit lower on the head - depending on where you want your Jacob's Ladder positioned.  We've done the Jacob's Ladder hairstyle before but I don't think I've ever posted about it so I will give some step by step instructions.  This one is a bit different than we usually do because it is positioned horizontally and we usually do it vertically. 
Start by grabbing a section from the bottom half of your part by using a rat-tailed comb to go from the part down to the bottom of the hair.  (Make sure your sections are not too large because you want to have a nice weave in the end and the more sections you have, the better the weave will look.)  Pull that small section into a ponytail using a clear elastic.  Now move up to the top half of your part and create a  parallel section from the edge of the hairline down to the part.  Before you secure that into an elastic you will want to pull up the top half of your first ponytail and add that in with you top section.  Now secure it into a ponytail and you've created the first rung of your Jacob's Ladder. 
We just finished a rung on the top section so you will now be creating another section on the top.  Pull the complete ponytail from the top in with the new section you just created and secure it with a clear elastic.  Divide that new ponytail in half.  Now create a parallel section on the bottom half and add in the other half from your very first bottom ponytail and half of the last ponytail you created on the top.  Secure it with an elastic and you now have your second rung of the ladder.  Create a new section on the bottom and pull all the hair from your most recent ponytail in with the new section and secure it with and elastic.  Divide that ponytail in half and create a parallel section on the top half. 
 You can see how I've created the top sections here and what our parts looked like.
 Keep moving back and forth from top to bottom with these instructions until all of the hair has been gathered over to the right ear and you've created several rungs to your Jacob's Ladder.
Now go back over to that hair that you section out at the very beginning and divide it into two equal sections.  Make sure it is still nice and wet and start weaving with your top section.  You will be going over and under the rungs in your Jacob's Ladder.  I used a Topsy tail to do this but it is not necessary.  Once you have weaved it all the way through your Ladder you can combine it with the top ponytail on the right side by adding another elastic.  Now go back and do the same thing with your bottom section but make sure to alternate the over and under with what you did using your top section so that it gives the basket effect.  Secure that piece in with the bottom ponytail on the right side. 
You should not have two full ponytails on the right side of the head and you will divide each ponytail into two equal sections and weave them all together to create a Flat 4-Strand Braid.  There are instructions for how to create this braid here.  Add a flower to the bottom of your braid and you're finished!

13 Ocak 2012 Cuma

Friday's Film: Swedish Piggies

We tried to get this video up as soon as possible because we had a lot of response on the hairstyle and many requests for a video.  I wish that the hair on the video looked a little more crisp and clean but you should still be able to get the general idea.

If you want to see pictures of the finished product as it should look, you can refer to the original post here. 

See, now wasn't that easy?!  :)

6 Ocak 2012 Cuma

Friday's Film: Back & Forth Half-Up

We had a lot of requests for this video and I apologize for it taking so long but we had to squeeze in our Holiday Hairstyles during December.

This is a tutorial for the Back & Forth Half-Up hairstyle that we did a while back.  
This video seems a bit dark and I apologize for that.  When my princess has wet hair it's even darker and harder to see.  :(  Hopefully you still get the general idea.
You can find instructions for the original post here.  This style is nice because it's only about 5 minutes in the making!

4 Ocak 2012 Çarşamba

Swedish Piggies

Here is a hairstyle that we came up with one morning and it is one of my new favorites.  You will want to make sure that you start with wet hair and you can use a hair gel to help it hold if your princess has finer hair.  This style works best if the bang are grown out but you can also modify it if your princess has bangs that hang on her forehead.
Create a short, off-centered part at the front of the head and comb the bang area down toward each ear.  Comb the rest of the hair straight back. 
Begin with the left side of your part and comb the front bang area down by the ear and then around the back of the head and over behind the right ear. 
Gather a portion of the bangs from the right side of your part and combine that with your left section by securing it with an elastic just behind the right ear.  You should now have one small pony on the right side of the head and the rest of the hair still remaining down. 
 Grab a small section of hair from the right side now - from under the previous section and elastic - and smooth it across the head and over to the left side.  Grab a small section of hair from that left side to add to your new right piece and secure them together with an elastic.  You will now grab another section of hair from the left side and this time you will comb it over to the right and secure it into that ponytail that is already there with another elastic. 
 Keep doing this back and forth across the head so that you begin to have a swept look.   Once all of the hair has been gathered you are finished and should have only two piggies remaining.  You can leave the piggies loose like we've done here or finish them off with braids or curls. 

15 Kasım 2011 Salı

Back & Forth Half-Up

Here is a hairstyle that is similar to The Switchback hairstyle that we did a while ago but it's done just a little differently.
Start by creating a small, off-centered part on the top of the head.  Comb the rest of the hair straight down. 
Start by working on the left side of the head.  Grab a section of hair from the part down to the left ear.
  Comb it around the back of the head and over to the right half.  (Make sure you don't go all the way to the right but that you stay on the back area of the head.)  Grab a loose section of hair from that right side and combine your combed section in with it.  Secure it with a small clear elastic. 
 Now move over to the right side of the head and section out an area from the part down to the right ear.  Comb that across the back and over the elastic to hide it.  Combine it with a small section of hair from the back-left side of the head and secure it with an elastic. 
 Now grab one final section from the left side - right behind the ear and pull it over that last elastic.  Comb it across the head and combine it with a final section of hair from the right side of the head.  (From just behind the ear.)  Secure it on the back-right side of the head with a small elastic and then pull a bit of the hair from the section above it down over that elastic to hide it. 
The rest of the hair can stay straight down or you can curl it.  It's a very simple, yet elegant hairstyle.