22 Ekim 2010 Cuma

Halloween Hairdos: The Haunted House & The Trick-or-Treat Bag

Yesterday I told you that I had some more hairstyles using the netting from the "Spider Web" and here they are. 
Pull all the netting up off the head and down into a ponytail.  Now add a couple of ghost clips to create a Haunted House.  (We made our clips out of ribbon but you can just cut some out of white felt and glue them to bobby pins or clips.)  Looking at it now, I should have added a full moon at the top and some bats...  :) 
Another fun look is the 3D Netting Ponytail.  Simply tie all your ends together at the boom of your ponytail and add a couple fun Halloween clips. 
 You can see that it has that 3-Dimensional look to it. 
 You could also place your spider clips on this for a different type of web. 
This is The Trick-or-Treat Bag and this is just a "for fun" style.  Your netting is already in the shape of a bag, so just fill it with some trick-or-treat candy and tie an elastic at the bottom to hold it in. 
 Add a cute little clip to the top to finish it off - we love Mickey at our house! 
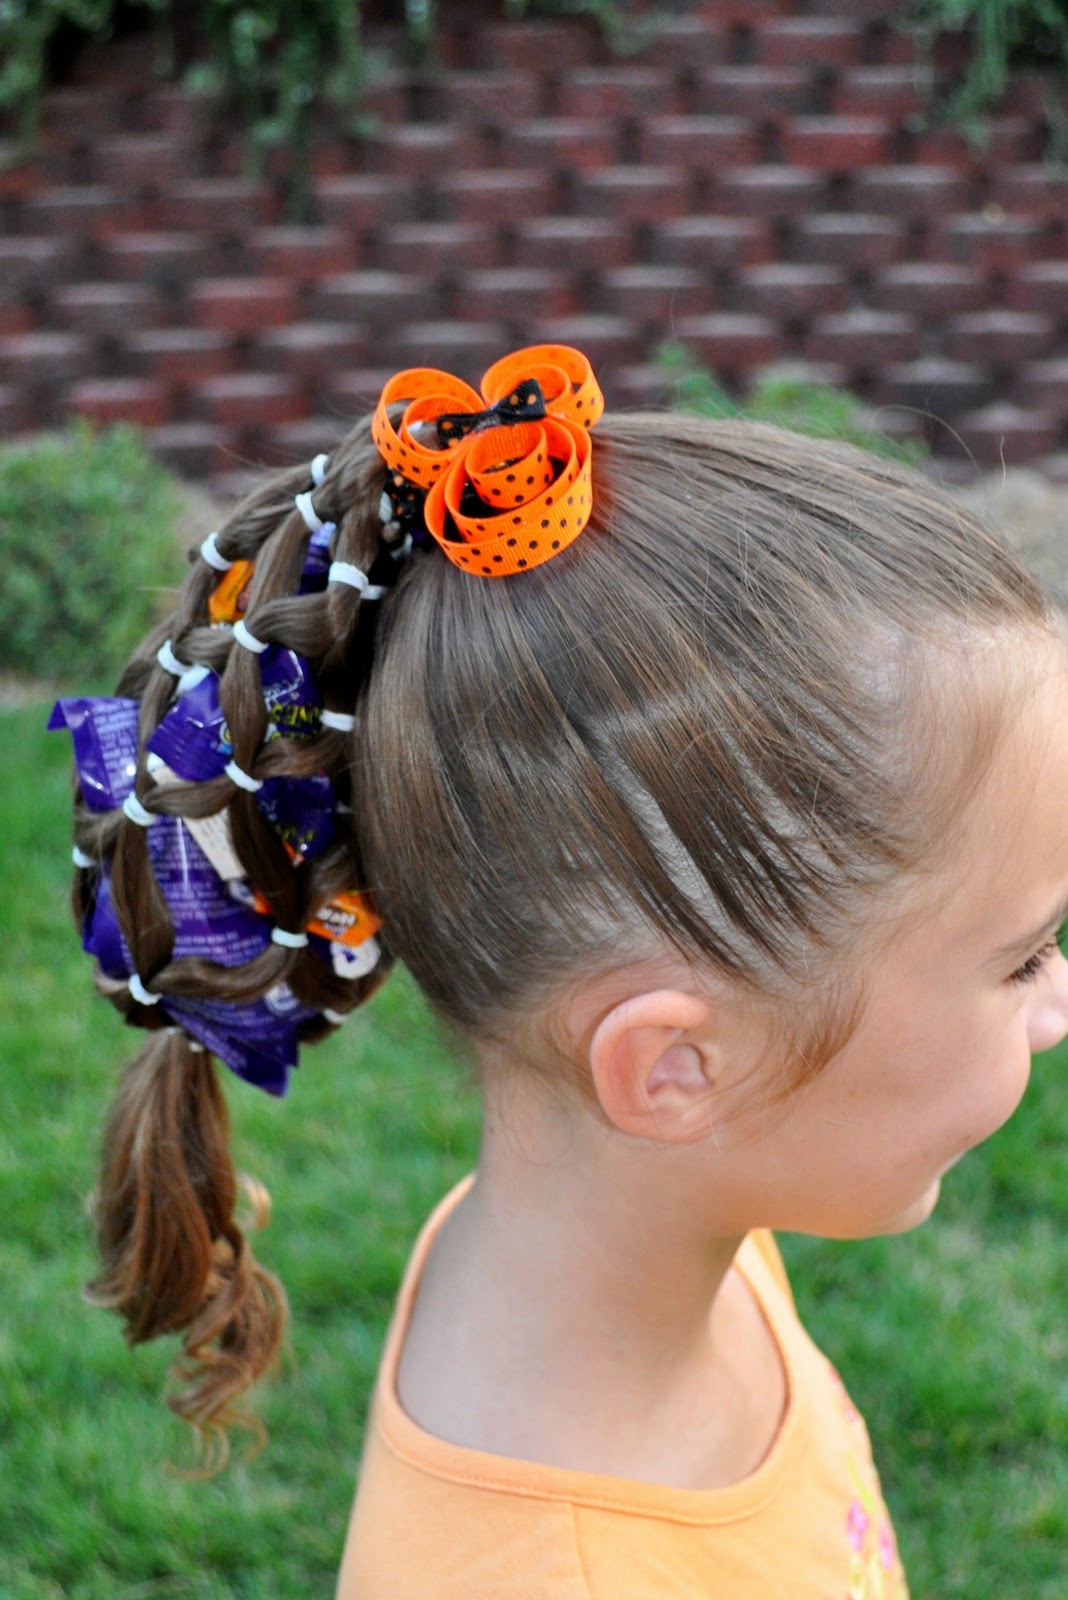
My sons loved this style and chased my princess around the house trying to grab her candy...  they live to torment her.  :) 
 Here are a couple of great updos also using this netting and this one is pretty with the curls on top.  The curls were just created from the twist buns off the "Spider Web" style but you could also curl them with an iron. 
Take the candy out of the "Trick-or-Treat Bag" and also take out your clip.  Now lift the bottom elastic up into the air and push it down into the middle of the netting until it meets the elastic from the original ponytail.
  Attach the two elastics together with a claw clip (which will be hidden under the curls) or bobby pins. 
Let the curls fall loosely on top and your Netting Updo is complete. 
The last Updo is very simple. 
Have your 3D Netting Ponytail hanging down and simply pull the bottom elastic up to the original ponytail elastic (making sure to go underneath all the netting) and tie them together with a festive ribbon. 
Have the bow tied down at the bottom instead of the top.
 Let the curls fall down below the bow and she's set to go.  
Now see all the fun styles you can create out of the one?! 
 Have fun! 

21 Ekim 2010 Perşembe

Halloween Hairdos: Spider Web

Now this one does require some time so make sure you don't plan to do this with only 5 minutes to spare.  :)  Also, you can recycle this style to create LOTS of different looks.  I'll add some more tomorrow. You'll see that it is worth the time that goes into it because you can get a few days of styles out of it.
Here are the little spider clips my princess and I made specifically for this hairstyle.  Aren't they cute?!
Have the hair completely wet and begin with a very TIGHT ponytail in the back of the head.  Make sure you gather all of the hair up into it. 
Now grab whatever color of elastics you want for the netting.  We started ours by breaking the ponytail into 6 small sections and tying each off with an elastic 1/2 inch above the starting elastic.  You'll want to pull each section outward along the head so that they are spreading out.  
*Tip: Use small claw clips to hold the sections you are not working with in place.*
Divide each new section into two equal pieces.  Combine the right piece and the left piece from the adjacent section with an elastic.  Continue doing this around the entire head until all 6 elastics are in for your second row of netting. 
Continue adding rows of netting as far out as you can go.  (It will depend on the length of your princess's hair.)  When you've reached a point where you're netting is finished, simply roll any extra hair into a small twist bun and secure it with a tiny claw clip.  You could also curl the ends if you would like, my princess just had tiny ends left over. 
Now you can grab your spider clips and add them wherever you like on your web. 
Don't forget to check back to see the "Haunted House", "Trick or Treat Bag" and a couple fun updos you can do using this hairstyle.  :)

20 Ekim 2010 Çarşamba

Contest


Hello everybody! So here is the deal, one of you guys have a chance to win a beautiful jewelry piece from Les Jumelles Boutique. All you have to do is leave a comment below saying which jewellery you would like to have and become a fan of Les Jumelles on facebook.

Check the itens ( online store)
Les Jumelles Boutique

Good Luck. x

Halloween Hairdos: Neanderthal

This is a really simple idea just for fun or if your princess is going to be a Neanderthal for Halloween.

 
I got this bone from an outdoor skeleton kit that my husband is using as part of his cemetery in our front yard.  Make sure the hair is really wet and pull it all back into a tight ponytail. 
 Take a small section of hair from the top of the ponytail and comb it so that it's really smooth.  Place your bone at the ends of the section and then roll it down to the head - just like you would roll a curler.  Use a bobby pin on each side of the hair to hold it in place. 
Now Barrell Roll the rest of the hair up under the bun and bobby pin it into place as well.  A Barrell Roll is basically taking all the hair and (beginning at the ends) roling it up into itself and making the shape of a barrell.  (The same motions you did with the bone but there is no bone in the middle.)  Make sure your pins form an "X" for a stronger hold. 
There you go - Ugh!

19 Ekim 2010 Salı

19 October 2010


So that's what I was wearing today, all black nothing interesting.. that's what I
wear at college.

Halloween Hairdos: Monster Eyes

A little while ago I had a post called "Infinity" and this is just exactly that hairstyle with some fun things added to it.
(Please refer to that post if you need step by step instructions.) 
First you are going to need some eyeballs.  These are little glow-in-the-dark eyes that I cut in half.  I got these at the dollar store but I've seen them all over the place.  Poke a hole on the side of each one and feed bobby pins through them so that each eye has two bobby pins. 
 Once you've finished the "Infinity" hairstyle you can just pin the eyes right into the middle. 
We also grabbed two green pipe cleaners and wrapped them around a pen to curl them.  (Only wrap 3/4 of the pipe cleaner because you will need the rest to stick down into the hair.) 
 I tried to get a picture of the eyeballs glowing in the dark but the camera didn't like it much and the pictures were very blurry. 
My princess loved this hairstyle!

18 Ekim 2010 Pazartesi