14 Eylül 2012 Cuma

Friday's Film: 7-Strand Sennit Braid

I was on Pinterest and  cam across this cool tutorial for rope braiding and this one is called a Sennit Braid.  you can find that original pin here.   I pinned it thinking it would be awesome to make a hair accessory or jewelry but then got to thinking that it could probably be used for a hairstyle as well.  
I did a bit of re-configuring with the strand and came up with this 7-Strand Sennit Braid:
Hopefully the video was able to explain it well for you.  As always, practice makes perfect with this braid.  
Here is what it looks like totally complete.  You can see that it looks like 2 side-by-side braids.  We have a couple other versions of 7-Strand Braids as well and I've listed those below with links to their original posts.  Just click on the name and it will take you over.

10 Eylül 2012 Pazartesi

Super-Sized Bun

I love experimenting with new supplies and tools so it's always fun to find a new little gadget.
I was out shopping the other day when I came across a super-sized bun mold at Claire's. 
 I bought this more specifically for myself but my princess wanted to wear it in her hair for church. 
I loved how it looked in her hair and we had several compliments on how elegant she looked.  
You definitely need hair past shoulder length for this bun mold because it requires lots of hair to cover it.  Start by simply pulling all of the hair back into a ponytail.  (The best results come from using wet hair.)  It can be a low, high or a side ponytail - it doesn't really matter.  Now slip the mold over the entire ponytail and the elastic.  Have your princess tip her head down and spread the hair evenly around the mold with a comb.
  Secure it into place by slipping another elastic over the hair and the mold.  Take the excess hair and divide it into at least 3 sections and twist or braid them.  Wrap those sections around the base of the bun mold and bobby pin them into the mold to secure them.  
You can either have your tiny little ends flare out or tuck them under to conceal them like we've done here.  Add a flower clip on the side if you like and it's finished.     

7 Eylül 2012 Cuma

Friday's Film: French Knot

This is a style that we kind of came up with on the spot this morning and decided that it would be a great video to share because it's an easier way to create a French Braid type of style.  
I apologize for the messiness of some of the video, my princess has extremely long hair and sometimes it looks super tangled.
 The hairstyle itself is really beautiful and it's nice because it's one that you can do on yourself as well.  (Not too many strands to keep track of.)
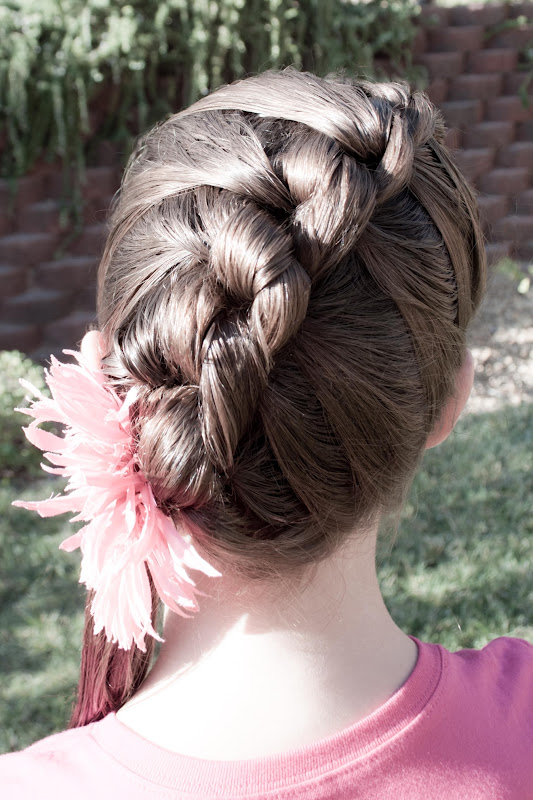
This shows the top of the braid and what it looks like as it gets started.
The bottom side of the French Knot tucks under while the top side tucks over and inside.  
We did our braid on an angle so that it ended as a side ponytail but the orientation of your French Knot is totally up to you.  
We added a flower clip to conceal our elastic on the side and that finished it off nicely.   

3 Eylül 2012 Pazartesi

make it easy


''The old Blogger interface will be removed in the coming months''

Nooo pleaseee!

Unbe-WEAVE-able

This hairstyle turned out really cute and I wish these pictures did it better justice but we were in a condo on vacation and these were the best shots we could get.  
Make sure you start with wet hair and create a high part going from one ear to the other so that you have a "headband" like section in the front.  Now you are going to create 8 small sections out of that front section you just created.  (4 on each side.)  Secure each of those 8 sections with a small elastic.  
Now you've got 8 little ponytails that you will pull out of the way and have your princess hold for a minute.  Divide the remaining hair in half by creating a part directly down the center of the head.  Pull each side into a low ponytail. 
 Now bring those 4 ponytails from the left side of the head and add them into the ponytail on the right side with a new elastic.  
You will now weave the 4 small ponytails from the right side through the left side ponytails using an alternating over and under method.  (I used a Topsy Tail to make it a bit easier.)  Once they have been weaved through you can secure them into the ponytail on the left side with a new elastic.
I've included this picture to show you what my weaving looked like in the back once I finished.  You can see that they are not crossing directly over that center part like they should so I just adjusted them with my fingers a bit until they all cross over that center part and then sprayed them with hairspray to make sure they stayed put. 
You can leave your two ponytails loose or finish them off however you like.  I've done a 5-Strand Braid out of each and you can find the instructional video for how to do that here.