31 Mayıs 2011 Salı

Seven little girls sitting in the back seat


What I wore, What I ate! yes this is what I wore, a primark hat, skirt from next and blouse from h&m. I also got some pictures developed today, no big surprise.

30 Mayıs 2011 Pazartesi

French Waterfall

A while ago I posted these instructions for the Topsy Tail Waterfall.  It had a very beautiful look but it was very loose so this is a bit of an updated version to that but this one does require the knowledge of the French Braid which the other does not. 
 I will give specific instruction for the hairstyle show here but you can use the French Waterfall as a headband, two braids or in any other form you like. 
Create an off-centered part that goes all the way back to the crown of the head.  Now create a parallel part 1/2 inch inside of the first and clip aside that new thin strip of hair. 
Create one more part parallel to the first two but make sire it's about 2-3 inches across the head.  Now you will create a French Braid out of the new section of hair (making sure to only gather hair from inside this parted section) and only add in hair until the crown of the hair.  Just finish plating a Regular 3-Strand Braid after that point.  Secure it at the end with a temporary elastic. 
 Now grab your Topsy Tail and that thins strip of air that you set aside.  Poke your Topsy Tail through the first plate of the French Braid and feed a bit of hair from your thin strip directly through it.
 Do this again with the second plate and so on until your entire thin strip has been fed through the plates of the French Braid. 
 Now brush all of the hair down to the nape of the neck and secure it with an elastic - making sure to include the braid.  Take the temporary elastic out of the braid and brush it into the ponytail.  Now braid the ponytail and secure it at the end with one final elastic.  Add some hair clips to finish it off.  

27 Mayıs 2011 Cuma

Flashback Friday: Wet-Pinned Curls

Wet-Pinned Curls can take some time to prep for but they have such a beautiful final look.  Start with the hair really wet and make sure you pull it up into any initial style before creating your curls.  Grab a box of bobby pins to have at your side before you start. 
Section out some mall pieces of hair - they can be medium or small, depending on how think you would like your curls.  Starting with the end of the hair, wrap it in a circular motion all the way up to the scalp and then pin it against the head using two bobby pins to create an "X" for maximum hold.  Your curls can be would as tightly or as loosely as you like just depending on how large or small you want your curls.  Continue wrapping and pinning sections of hair all around the head.  When you are finished your princess will resemble a 20's Flapper with all the wet tight curls against her head.  I wish I had taken a picture at this point but back in the day I never had a reason to do that!  :)  The hair will take about 3 hours to set.  (You can speed up that time by using a warm dryer to dry the hair.) 
When you're ready, take the pins out of the hair and let the curls fall loosely.  Spray the hair with a bit of hairspray to help hold the curls and you're all finished!

26 Mayıs 2011 Perşembe


That is pretty much what I am doing today, except there is no sunlight. It's raining outside, thundering too and I gotta say I love that.

25 Mayıs 2011 Çarşamba

Do The Twist

Corkscrews have such a pretty look to them and they hold so nicely that I find myself using them quite a bit.
  Your first step with this style is to create a part from ear to ear so that you have a top section to work with.  Now separate a middle section from that top section and clip it aside for a moment.
 
 You should have two remaining sections from the top that you will want to create Corkscrews out of.  Have your princess hold these two Corkscrews while you move back up to that middle section.
 
 Divide the section into two equal parts and secure each part with an elastic. 
Using your Topsy Tail, create a Pull-Through out of each small section and then twist them both together to create another Corkscrew. 
Combine the three Corkscrews together at the back of the head with an elastic. 
Take the hair from that combination and create another, slightly larger, Corkscrew.  Add that Corkscrew in with all of the remaining hair at the nape of the neck and secure it with an elastic. 
 Now separate that new ponytail into two even pieces and create a Corkscrew out of each piece.  Twist those two Corkscrews together creating a Hawser Braid.  Add any hair clips you like and you're all finished. 

24 Mayıs 2011 Salı


There is a fire smoke close to my house I can see it from the back garden, it is the colour of charcoal and now it is everywhere. I took pictures of it with my point and shoot camera. I wonder what may have caused the fire. When I see accidents or fire I always wonder what may have caused it. But I never find out, because I never have the opportunity to ask someone so I forget about it instantly, sometimes I make something up in my mind. I am not really curious, so when there is an accident I never come close to see it. I think I am a bit afraid of seeing someone hurt. I once did though, I saw a man's leg and its exposed fracture. I dreamed about human flesh and blood for two days. Anyway I've been working on my college final major project. I was really excited about it, but I felt disappointed when I got a roll of film developed, the prints came out all blue and I promised myself to never get my film processed there again.

23 Mayıs 2011 Pazartesi

Low Frenchies

This is another post that is nothing new but it's more of a different way of looking at things.  So often I am caught in my habit of placing everything in it's usual spot when a common hairstyle can look so cool just by changing the placement of a few things.  This hairstyle is an example of that.
 
 It's your basic Side By Side French Braids but we've changed a few things around. 
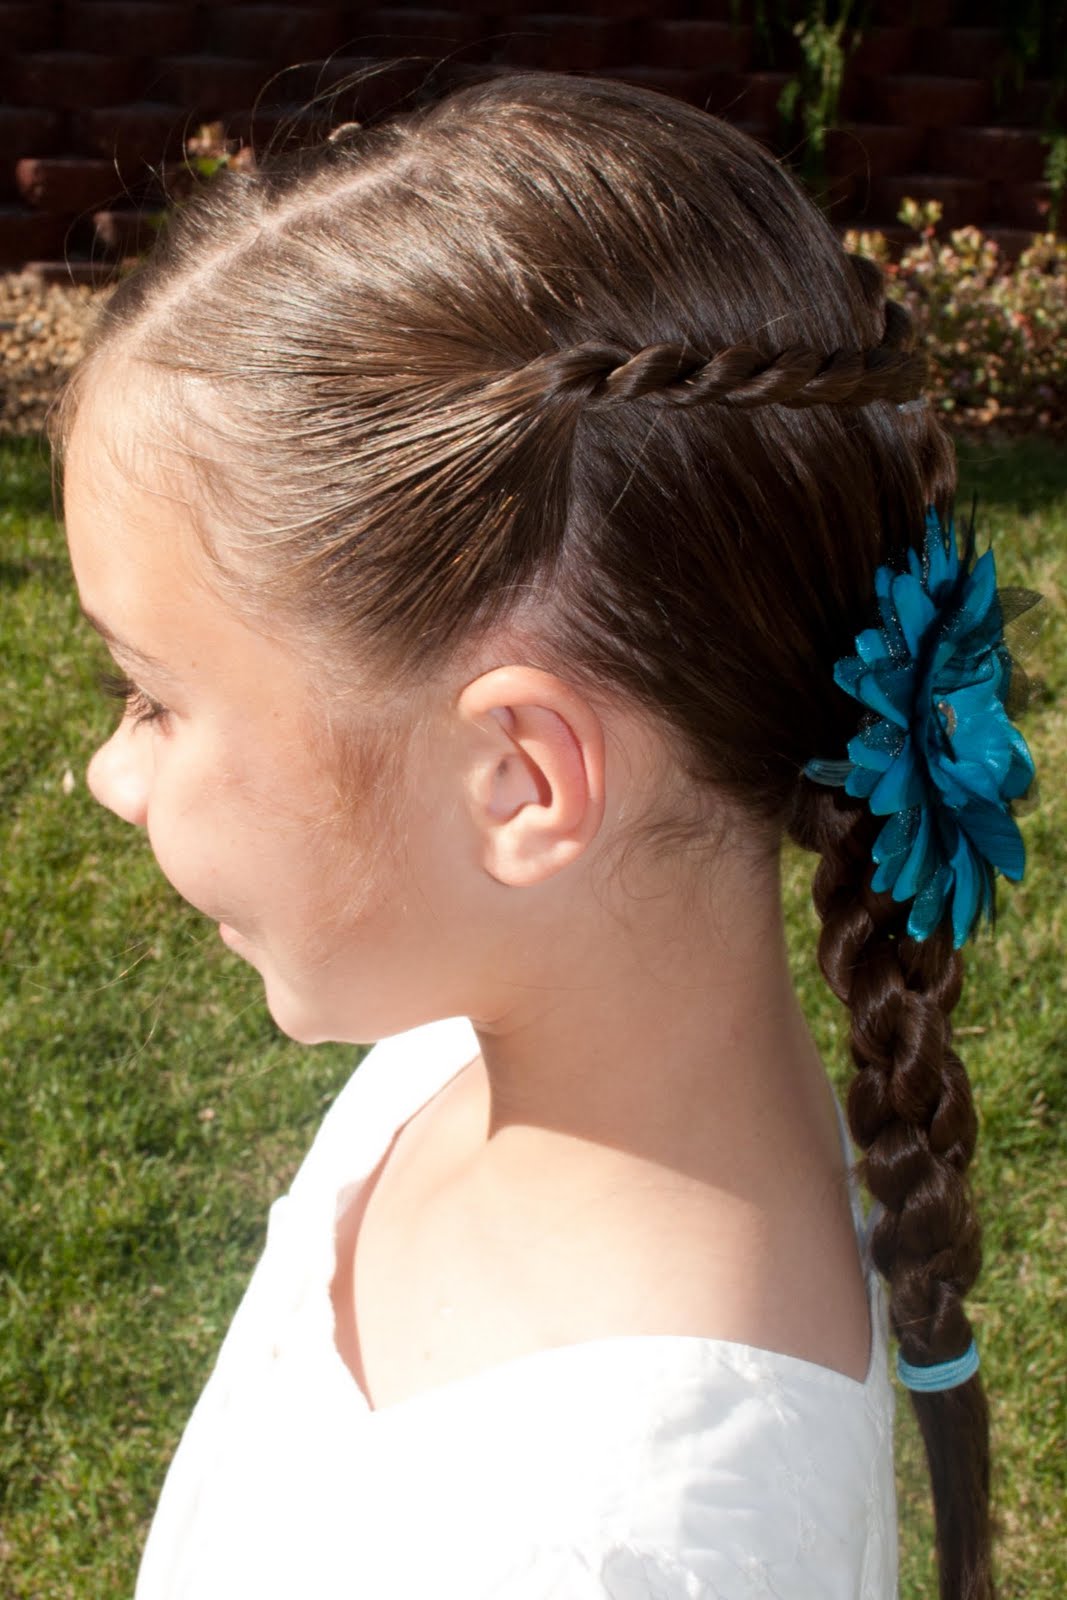
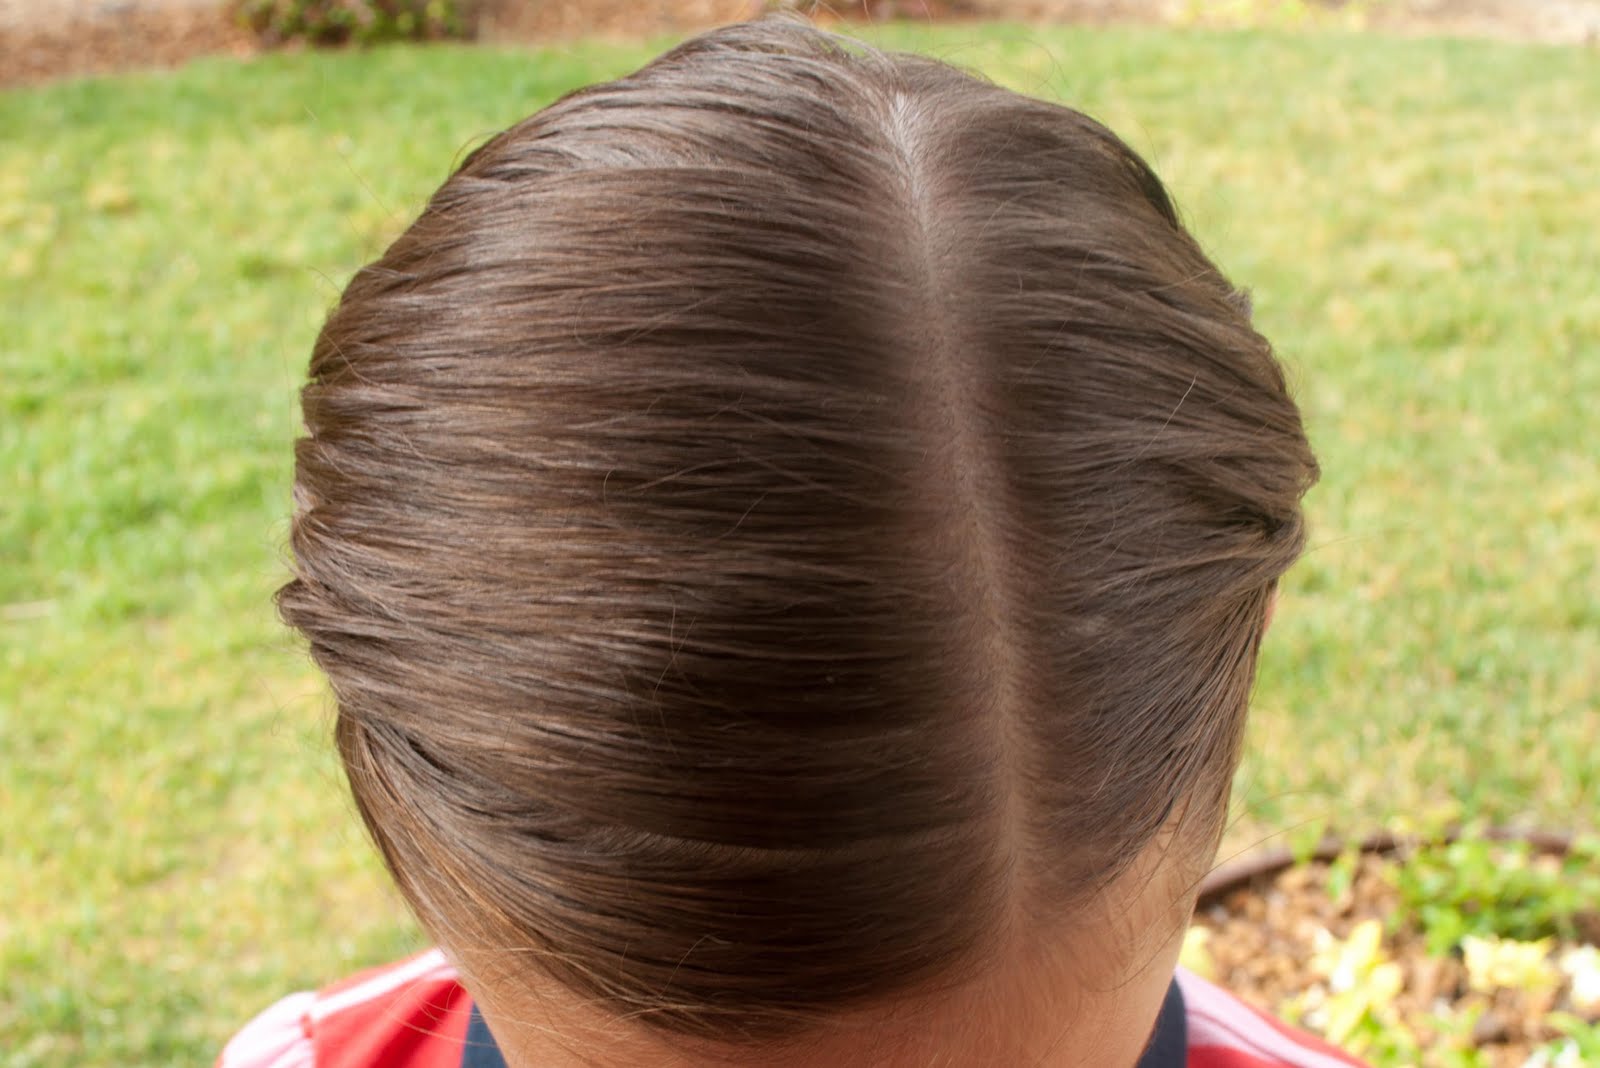
 First we moved the part a bit.  Instead of having it directly in the middle of the head we have off-centered it a bit.  (It starts off centered but will end up in the center of the neck at the bottom.) 
It's usually easiest to begin with the larger section of hair.  You will be doing a regular French Braid but instead of placing it directly in the middle of it's section, move it a bit lower and closer to the ear. 
You will probably need to keep a comb handy to smooth out each piece as you add it into your French Braid so you avoid any "sharks".  (Hairs that bubble up like a shark fin.)  When you've added all the hair in from that side of the head, finish braiding to the bottom of the hair and secure it with an elastic.   
 Repeat the same steps for the other half of the head - pulling the braid lower by the ear. 
When you finish you will have two loose braids that you can connect with some bobby pins so that they are attached side-by-side.  Combine them at the bottom with a final elastic and add some hair clips where you would like. 
 It's a fun new look on an old favorite!

20 Mayıs 2011 Cuma

Flashback Friday: Ring of Flowers

This hairstyle was from Easter 2008 when my princess was finally starting to get excited about her hair.  (Yes, there was a time when she HATED getting her hair done, just like any normal little girl.  She LOVES it now though.) 
 
Her little Easter dress had tiny rosettes all over it so I made some little hairpins for her hair by hot gluing crafting rosettes to bobby pins. 
I created a high Angel Halo on her head first.  (Click for instructions.)  Then I placed the rosettes into the halo in a mixed pattern.  
All the bobby pins helped to hold the halo tightly and it looked beautiful all day long.  
It even held together as she ran around like a wild child finding all the Easter eggs hidden around her playhouse!  :)  

18 Mayıs 2011 Çarşamba

what will we find inside your room, notes in the margins records always spinning


I guess this is going to be my last post, at least for a while. I have to get college work done and I guess I've been blogging a lot. Therefore I decided to make this last post about my room, yeah nothing good, I just have these photos here so I thought I could post them. I might update my tumblr now and then though. xx

a song


I found this nice grey marl jumper on a hidden clothes rack in Primark, for only five pounds, the bag is also from primark. I also bought some film rolls that I will be using soon.

Nifty Napkin Rings

Here is something that I know you've never seen before!
So I found these nifty little wooden napkin rings in a set at our local dollar store and I knew I could put them to use in my princess's hair.  (My mind works strangely like that!)  You will see these again in the future because they were really fun to work with. 
I started this hairstyle by sectioning out a little square of hair right in the front that I braided with a Regular 3-Strand Braid.  I had my princess hold onto that while I parted the remaining hair directly down the middle so that I now had two sections. 
 I pull each section into a tight piggie - adding my braid in with one of them.  Brush out any remaining plates of the braid that are underneath the elastic. 
Now add another elastic on each ponytail about 2 inches below the first.  Slip your napkin rings over the second elastic and grab your Topsy Tail.  Poke your Topsy Tail through the top of the napkin ring and right through the center of that second elastic but don't pull it all the way through yet. 
Grab a small section of the ponytail under the elastic and wrap it up over the napkin ring and through the loop of your Topsy Tail.  Now Pull the Topsy Tail down through the elastic o secure that hair around the napkin ring.  Keep dividing the hair under the elastic into sections and feeding them up around the napkin ring until it is completely covered.  I was fortunate to find napkin rings that were really close to the color of my princess's hair which helped conceal them better. 
Once all of the ponytail had been wrapped around the ring and fed through the elastic with the Topsy Tail, I braided the excess hair.  I secured the braids with elastics and it was complete. 
Look how cute these little piggies look!